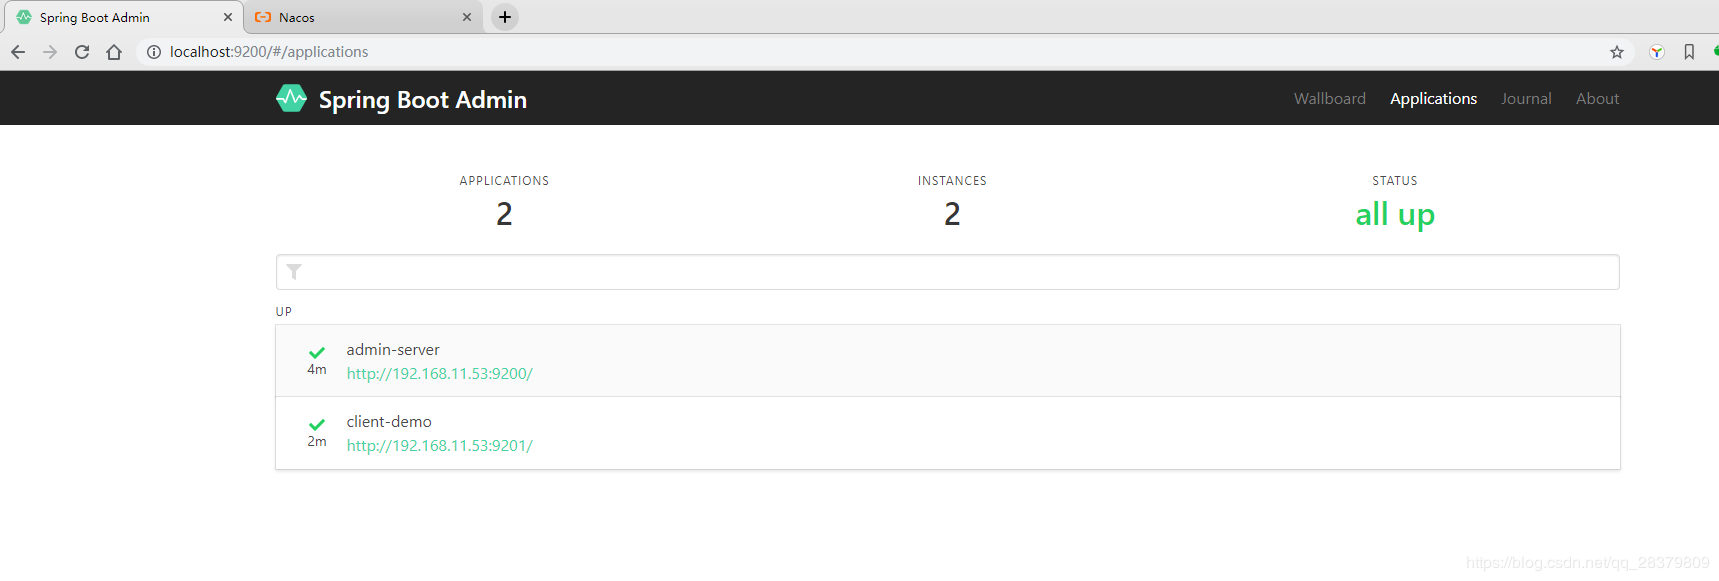
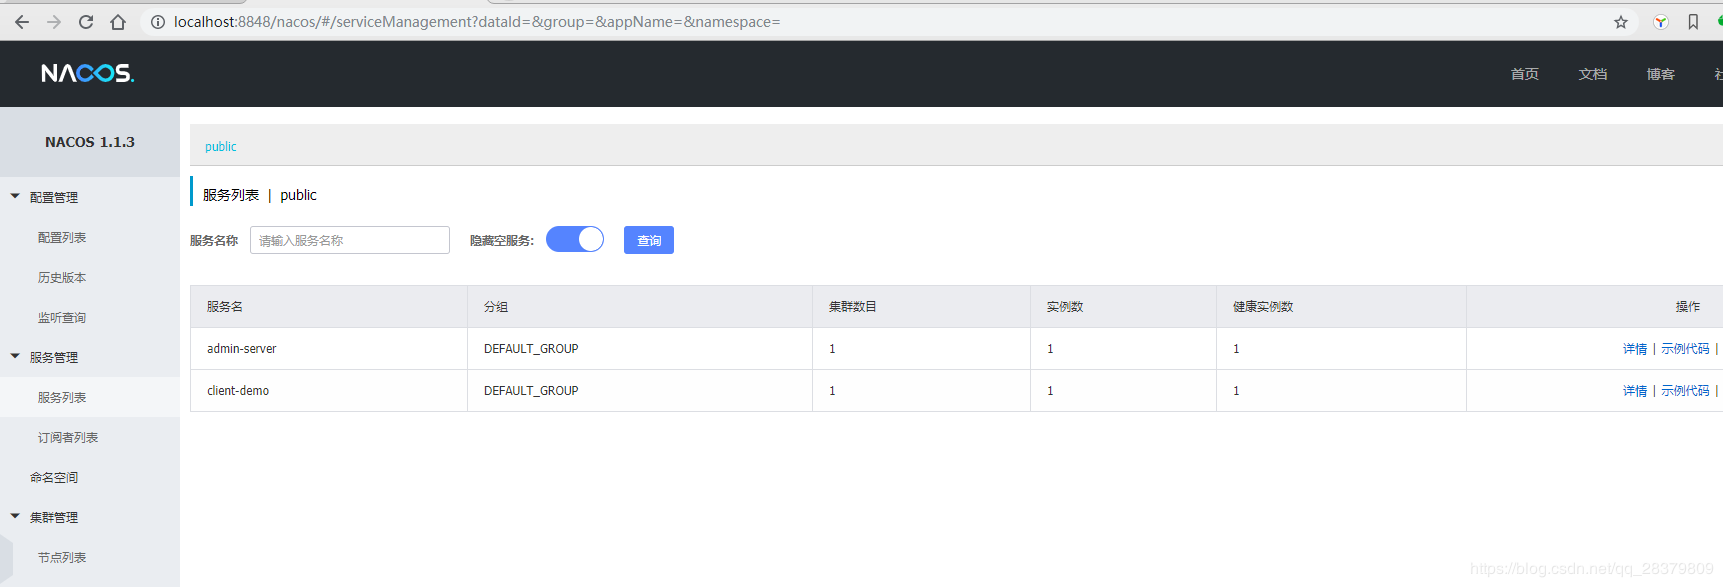
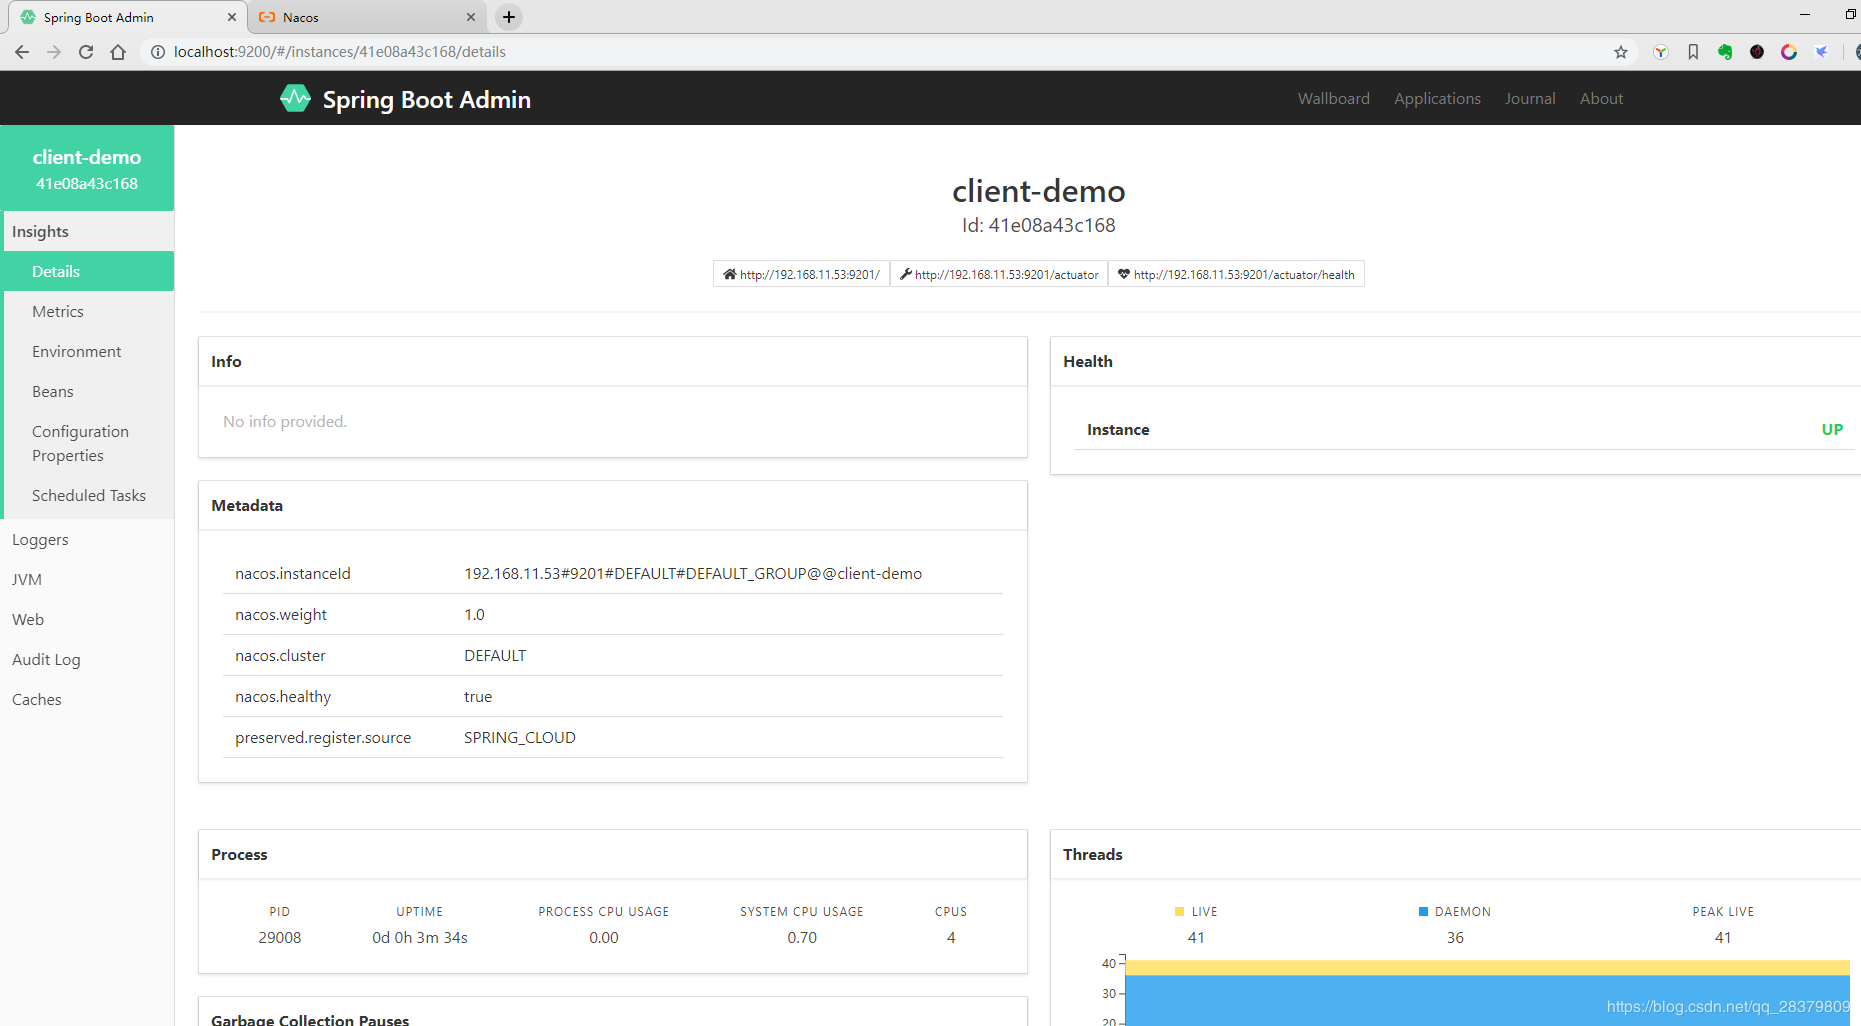
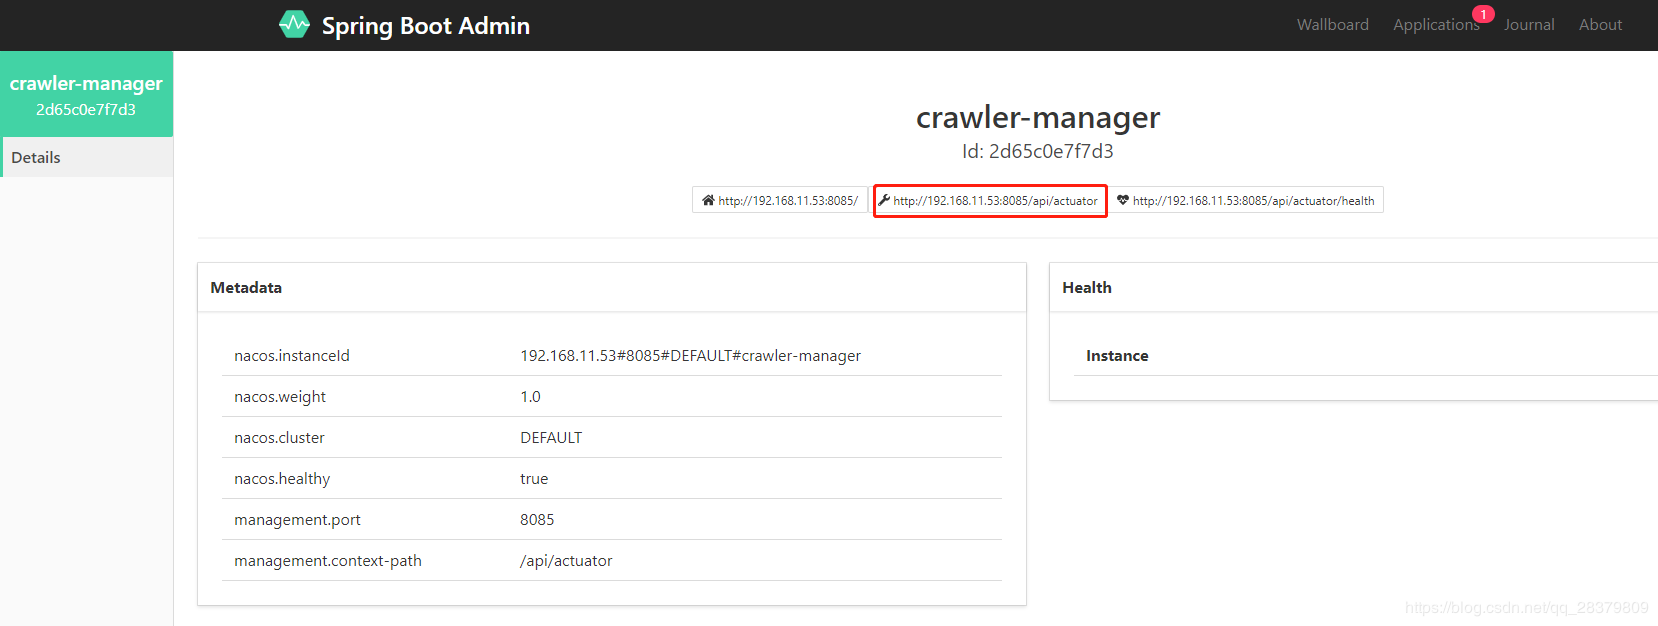
Loading... **项目源码地址**:[https://github.com/laolunsi/spring-boot-stack](https://github.com/laolunsi/spring-boot-stack) 前一节讲述了利用SpringBoot Admin监控SpringBoot应用,能够监控程序的状态、JVM的状态等等,这一节将介绍在SpringCloud中利用SpringBoot Admin来监控微服务。 本篇文章主要分为两部分,第一部分是主题,介绍如何在微服务架构中使用SpringBoot Admin,第二部分是扩展,讲解关于在意外情况(需要修改健康监控地址)或内外网环境问题下如何去正确地让SpringBoot Admin工作起来。 本篇文章使用SpringBoot 2.1.9、SpringCloud Greenwich.SR3、SpringBoot Admin 2.1.5版本,此外,服务注册中心采用阿里巴巴开源的Nacos。 --- ## 一、SpringCloud使用SpringBoot Admin ### 1.1 Admin-Server并注册到Nacos 创建一个SpringBoot项目,命名为admin-server,引入如下SpringCloud、Nacos、SpringBoot Admin的依赖: ```xml <properties> <java.version>1.8</java.version> <spring-cloud.version>Greenwich.SR3</spring-cloud.version> <spring-boot-admin.version>2.1.5</spring-boot-admin.version> </properties> <dependencies> <dependency> <groupId>org.springframework.boot</groupId> <artifactId>spring-boot-starter-test</artifactId> <scope>test</scope> </dependency> <!-- admin server --> <dependency> <groupId>de.codecentric</groupId> <artifactId>spring-boot-admin-starter-server</artifactId> </dependency> <!-- nacos --> <dependency> <groupId>org.springframework.cloud</groupId> <artifactId>spring-cloud-alibaba-nacos-discovery</artifactId> <version>0.9.0.RELEASE</version> </dependency> </dependencies> <dependencyManagement> <dependencies> <dependency> <groupId>org.springframework.cloud</groupId> <artifactId>spring-cloud-dependencies</artifactId> <version>${spring-cloud.version}</version> <type>pom</type> <scope>import</scope> </dependency> <dependency> <groupId>de.codecentric</groupId> <artifactId>spring-boot-admin-dependencies</artifactId> <version>${spring-boot-admin.version}</version> <type>pom</type> <scope>import</scope> </dependency> </dependencies> </dependencyManagement> ``` 配置文件,特别注意这里使用nacos作为注册中心: ```yaml server: port: 9200 spring: application: name: admin-server cloud: nacos: discovery: server-addr: localhost:8848 ``` 启动类,启用@AdminServer和@EnableDiscoveryClient注解: ```java package com.example.adminserver; import de.codecentric.boot.admin.server.config.EnableAdminServer; import org.springframework.boot.SpringApplication; import org.springframework.boot.autoconfigure.SpringBootApplication; import org.springframework.cloud.client.discovery.EnableDiscoveryClient; @SpringBootApplication @EnableDiscoveryClient @EnableAdminServer public class AdminServerApplication { public static void main(String[] args) { SpringApplication.run(AdminServerApplication.class, args); } } ``` --- ### 1.2 Client-Demo注册到Nacos 创建client-demo项目,引入SpringCloud和Nacos依赖,注意这里不需要引入SpringBoot Admin了: ```xml <properties> <java.version>1.8</java.version> <spring-cloud.version>Greenwich.SR3</spring-cloud.version> <spring-boot-admin.version>2.1.5</spring-boot-admin.version> </properties> <dependencies> <dependency> <groupId>org.springframework.boot</groupId> <artifactId>spring-boot-starter-web</artifactId> </dependency> <dependency> <groupId>org.springframework.boot</groupId> <artifactId>spring-boot-starter-test</artifactId> <scope>test</scope> </dependency> <!-- admin client,该依赖必须要加上,否则会访问不到健康监控的接口 --> <dependency> <groupId>de.codecentric</groupId> <artifactId>spring-boot-admin-starter-client</artifactId> </dependency> <!-- nacos --> <dependency> <groupId>org.springframework.cloud</groupId> <artifactId>spring-cloud-alibaba-nacos-discovery</artifactId> <version>0.9.0.RELEASE</version> </dependency> </dependencies> <dependencyManagement> <dependencies> <dependency> <groupId>org.springframework.cloud</groupId> <artifactId>spring-cloud-dependencies</artifactId> <version>${spring-cloud.version}</version> <type>pom</type> <scope>import</scope> </dependency> <dependency> <groupId>de.codecentric</groupId> <artifactId>spring-boot-admin-dependencies</artifactId> <version>${spring-boot-admin.version}</version> <type>pom</type> <scope>import</scope> </dependency> </dependencies> </dependencyManagement> ``` 配置文件: ```yaml server: port: 9201 servlet: context-path: '/api' spring: application: name: client-demo-hello cloud: nacos: discovery: server-addr: localhost:8848 metadata: management: context-path: '${server.servlet.context-path}/actuator' management: endpoints: web: exposure: include: '*' ``` 启动类: ```java package com.example.clientdemo; import org.springframework.boot.SpringApplication; import org.springframework.boot.autoconfigure.SpringBootApplication; import org.springframework.cloud.client.discovery.EnableDiscoveryClient; @SpringBootApplication @EnableDiscoveryClient public class ClientDemoApplication { public static void main(String[] args) { SpringApplication.run(ClientDemoApplication.class, args); } } ``` --- ### 1.3 测试SpringBoot Admin监控微服务 启动nacos和上面创建的两个服务。 打开浏览器,输入admin-server的地址:  打开nacos的地址:  通过admin-server的监控页面,进入client-demo的详细监控信息页面:  --- ## 二、SpringBoot Admin下服务域名注册、context-path配置导致健康检查失败等问题的解决 ### 2.1 解决服务通过域名访问问题(外网环境) 生产环境中,如果某个服务是通过域名注册到服务注册中心的,那么就有问题了——SpringBoot Admin默认是采用配置的ip+port的形式来获取心跳数据的,而这个端口号默认呢是项目启动的端口号,比如8081,如果域名是hello.eknown.cn,那么SpringBoot Admin获取到的地址开头就是:http://hello.eknown.cn:8081,问题来了,这个地址能获取到数据吗? 比如http://hello.eknown.cn:8081/actuator/info,显然是个404。 想要域名地址,又不想要8081端口,解决办法很简单,如下配置: ```yaml cloud: nacos: discovery: server-addr: 127.0.0.1:8848 ip: hello.eknown.cn # 如果需要指定ip或域名,这样进行配置,端口80默认转发到域名 port: 80 ``` 还有一个问题,如果项目有context-path呢,那么健康监控的地址就是http://ip:port/context-path/actuator/info这种形式了,但是服务注册中心和SpringBoot Admin获取到的地址并不是这样的,它们获取到的地址依然是http://ip:port/actuator/info,显然也是404。 我们必须告诉服务注册中心,我们需要重新定义健康检查的路径,解决方案如下: ### 2.1 解决server.servlet.context-path有值导致健康检查失败的问题 以前写Spring项目习惯这样配置: ```yaml server: port: 8085 servlet: context-path: '/api' ``` 这样就有问题了,比如默认的健康监控地址为`localhost:8085/actuator`,而实际监控地址应该是`localhost:8085/api/actuator`。  如果是新项目还简单,把这个context-path删掉就行了。但如果是旧的SpringBoot项目,或者这个项目必须要配置context-path,那怎么办呢? 既想要context-path,又想要健康监控,有这样两全其美的事吗? 有的! 这样配置,介绍两种方式: 1.management配置(不推荐,原因下面讲) ```yaml management: server: servlet: context-path: "${server.servlet.context-path}/actuator" port: ${server.port} endpoints: web: exposure: include: '*' # 暴露所有端点。默认情况只公开/health和/info端点 ```   这种方法有缺陷:在服务配置域名的情况下,SpringBoot Admin获取到的健康监控的地址会变成:`http://eknown.cn:8085/api/actuator`,正确的结果应该是`http://eknown.cn:80/api/actuator`。 所以推荐使用下面的配置方式,不会因为`management.server.port`的配置,导致nacos上配置的port失效。 2.nacos的management配置: ```yaml spring: cloud: nacos: discovery: server-addr: localhost:8848 metadata: management: context-path: '${server.servlet.context-path}/actuator' ```   注:如果同时存在context-path和域名,就组合一下,比如: ```yaml server: port: 8085 servlet: context-path: '/api' spring: application: name: client-demo cloud: nacos: discovery: server-addr: 127.0.0.1:8848 # ip: eknown.cn # 如果需要指定ip或域名,这样进行配置,端口80默认转发到域名 # port: 80 metadata: management: context-path: '${server.servlet.context-path}/actuator' # 这里配置解决context-path的问题 management: endpoints: web: exposure: include: '*' # 暴露所有端点。默认情况只公开/health和/info端点,注意,经过测试,这个配置放到上面的nacos里是不起作用的 ``` 参考: > 1. SpringBoot Admin监控集成nacos服务发现:https://my.oschina.net/u/1428688/blog/3110948 Last modification:December 26, 2019 © Allow specification reprint Support Appreciate the author AliPayWeChat Like 0 请作者喝杯肥宅快乐水吧!
4 comments
12321312312312
咕咕
咕
hello